

School is in Session!
For the next three blogging days, I'm going to teach you
how to design your own fabulous blog header.
After that, we'll move on to the
cool share buttons, side bar labels, and what not.
Part 1 of this series is strictly for beginners.
Those of you who are familiar with using an online photo editing website to create blog stamps, buttons, etc. might want to skip this part.
Blogger Beginners...
This is for you!
:)
When I first started my blog a year ago, I had no clue how to make my blog page look good. It saw several changes over my first year and I wasn't very satisfied with any of them.
I wish I had had someone to teach me
how to make my blog look good!
When I moved from my old blog to this one,
I was determined to have a blog page that I loved.
This is my old blog page:
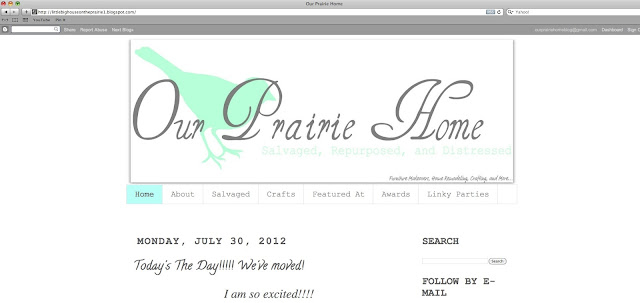
Meh.
My old one was kind of blah and not very professional looking.
I wanted something clean and fresh.
I wanted to show off some of my creations in my header, so it would be the first thing you see when someone comes to my page.
A summary of what Our Prairie Home is,
in one glance.
And...
I wanted it to be professional.
And yet, I had no idea what to do.
Enter trial and error.
First off, let me say that I am NOT a website designer.
There may be a "right" way.
And there might be an easier way.
However, this is my way.
And since lots of people have asked how I did it,
that's what I'm going to be showing.
:)
And...
It's a lot cheaper than paying someone
to do it for you.
And we're all about cheap at Our Prairie Home.
;)
First off...
Go to PicMonkey.
The homepage should look like this:
| Pic Monkey |
PicMonkey is a FREE online photo editing software. You don't have to sign up for anything. You just go to their page and get started.
I love it!
I love it!
Click "Edit a Photo".
Yes, I know you can't really see it, but it's there.
Right click on it and save it
to a photo file on your computer.
or
Right click on it and save it
to a photo file on your computer.
or
You can get one by googling "white" on google images and saving it to your photo file on your hard drive.
Okay... Upload your white image.
After your white image is uploaded, you're going to resize it.
Click "Resize".
Uncheck "Keep Proportions".
Enter "960x369".
Click "Apply".
Your white image should look like this:
*Note: This size will vary according to the width of your blog. Your goal is to have your header be the same width as your blog body. You may have to resize your finished product several times for an exact match. Or, you can resize the width of your blog to match the width of your header. Whatever works for you.
Next is the fun part...
Designing Your Header
The big thing about your header design that is you want your header colors to complement your blog colors. Tailor them to each other. That way, your blog is one seamless looking website.
Me?
I'm a big one for clean lines.
So, as you can see, my blog background is white with the only color coming from my header, blog posts, and side bar.
Some people prefer designer backgrounds,
like Shannon from Fox Hollow Cottage.
But, as you look at Shannon's page, notice how all her colors are complimentary - Aqua background and header text with black and pink accent colors in her blog text and pictures.
It looks fab!
So, be sure that your header complements
your blog design and color choices.
Okay... Creating.
The big thing with designing and creating your header is to visit other blogs. Look at the ones that you like. Think about what it is that draws you to them. In your mind, break down each header you like by looking at the shapes. If you don't know how to do HTML codes (the devil, I tell ya!), figure out how to combine shapes to make others.
In short, imitate what you like
about other blogs
and tailor it
to your style to make it yours.
Think outside the box.
PicMonkey offers lots of shapes, fonts, pictures, etc. for you to use in the designing of your header.
Play a bit.
I wanted my blog header to somewhat go with the furniture tags I had made, so that's why I chose the beige and sage green,
with darker brown accents.
It's also why I chose the fonts.
I started working with the lettering first
to determine style and placement.
Click the "P" symbol
on the left side of the page.
That will bring up the page where you can add and edit your text.
(And of course, PicMonkey had to choose today to change how to edit text,
so it took some doing to figure it out a little. I liked the old way better!)
Choose your font.
There are a lot to choose from.
As you can see, I'm using "Cardo".
Click "Add Text".
Click inside the text box and type in your blog name.
Highlight your text to change the font and color.
You can change the size, fade (which makes the text lighter), make it bold, whatever... in the little text control box that you see below.
TIP: When you find a color you like, right down the number/letter combination above the little rectangle that shows the color in the text control box (See picture below). In this case, the ID number of the color green I'm using is 2E7C00 and it is faded to 64%. Also write down the fade percentage. That way, if you use that color for additional text or shapes, you're not struggling to color match. Then you'll be able to just click on top of the numbers, it will turn gray like pictured below, and you can enter the ID number. Hit enter to apply it and then adjust your fade percentage.
You can also adjust the size of the text itself in the little text control box as well. Make sure you adjust the size of your text box around on your image accordingly, so large text sizes fit.
It's easier to make each section of text in a different text box, that way you can use different colors/different fonts and sizes as you see fit.
I would recommend only two fonts per header.
Otherwise, it'll look too busy.
Later, when it's time to fine tune, you'll go adjust sizes and placement of the text accordingly.
Adding text:
To adjust the text box size, right click on your text. The little circles will come up around your text box and you drag your cursor to make the text box smaller or larger.
Adjusting text box size:
I know this is elementary for some,
but I'm talking to the beginning beginners here.
:)
You also drag the text box to the location you want this way - by clicking on the mouse, holding it down, and moving the box.
Okay... So I've fiddled around some and my text is all done.
Let's add some shapes.
Click on the "Overlays" tab on the left side of the tool bar.
(That's the one that looks like shapes.)
That will bring up choices that look like this:
You can use any of these overlays, as you see fit. For sake of illustration, I'm going to use "Geometric" because it's what I used when creating my header.
You can use anything you want.
As you can see above, I have added three ovals on the left side and a square in between "Prairie" and "Patina" to match my furniture tags.
You add overlays exactly like you add text.
Everything is the same - size, color, and dragging to location.
I matched the colors by entering in the color numbers that I wrote down earlier.
PURTY!
Next I'm going back into the text tab
to add text inside my ovals.
You do exactly what you did earlier to add your text and then you drag it over on top of the ovals.
Change the color shade to white.
It should look like this:
After I got done monkeying around (pun intended HA!) with the shapes, I realized my blog title and subtitle text was too far to the right.
So, I readjusted the size and location of the text.
You can do this until it all looks the way you want it to.
Here's the final product:
One last thing before you're ready to save it to your computer.
Click on "Basic Edits",
which is the top page tab.
Click "Crop".
And then you're going to want to crop your image as close as you can.
You should be left with this:
Click "Save".
Add pertinent info and save this image to your picture file.
D.O.N.E.
This is the top half of your blog header.
Aaaaannnnndddd...
That's your homework for this weekend.
Create a fabulous top half
for your blog header.
Heck yeah, you have homework!
Like I said, school is in session.
And I'm the mean teacher that gives homework on weekends.
HA!
:)
On Monday we'll be creating
the bottom half of your header.
Have a great weekend, y'all... and get to work!
;)
Dream Big,

are you serious?? google white backgroud? I am sooo stupid.....all this time I have been finding pictures with a small blank spot on them and cropping and changing the colors just to get a white background..........UGH!!!!!!! You are so smart! :)
ReplyDeleteNice job...Now I know.
Hugs,
Karin
This is very informative. I've heard so much about pic monkey so I'm going to have to try out your tutorial some time soon! Thanks for sharing!
ReplyDeleteJennifer
I'm so glad you are doing this. I hope I can get my homework done this weekend - I cleaned for 11 hours straight today, because my mother is flying in for the next few days!
ReplyDeleteWhat a nice way to share and give back!! And... your header looks mahvelous dahling :)
ReplyDeleteSo glad I ran across your site today. I've been playing around and wanting to change my over-all background of my page for a couple of weeks now. Just scared of messing things up. When I went with blogger, I chose one of their templates but now I'm not liking it too much.(Tan basic blah background) I want a white background with a nice header like you have. I'm wanting a clean and crisp overall look. Great tutorial on how to do the top half, will be following you now so I don't miss the next post. Hopefully I'll have time to do the homework this weekend.
ReplyDeleteOkay, so some day I really need to sit down and read through this. Carefully. Can you believe I have no idea how to do any of this?!!! Making a header included. Makes my brain hurt thinking about it. ha.
ReplyDeleteYou are awesome!!!! I have just started my blog and have been agonizing over what to do!!! This is perfect. I can get it going to look pretty and evolve over time!
ReplyDeleteThanks for this great information. I totally agree with your perspective. Your articles made me want to read more.
ReplyDelete