

I am the No-Sew Queen!
If I can figure out a way to get 'er done without sewing...
{Because I can't... Sew, that is...}
Then I will.
{Otherwise it doesn't get done.}
{Otherwise it doesn't get done.}
And this little dealie was the biggest feat I've ever accomplished,
so for all of y'all that can't sew either...
And still have nightmares about Home Ec...
{I still do!}
so for all of y'all that can't sew either...
And still have nightmares about Home Ec...
{I still do!}
I'm your gal.
Because today I'm going to show you a...
That's right.
No sew.
And when I say no sew, I mean I didn't even touch it with a needle.
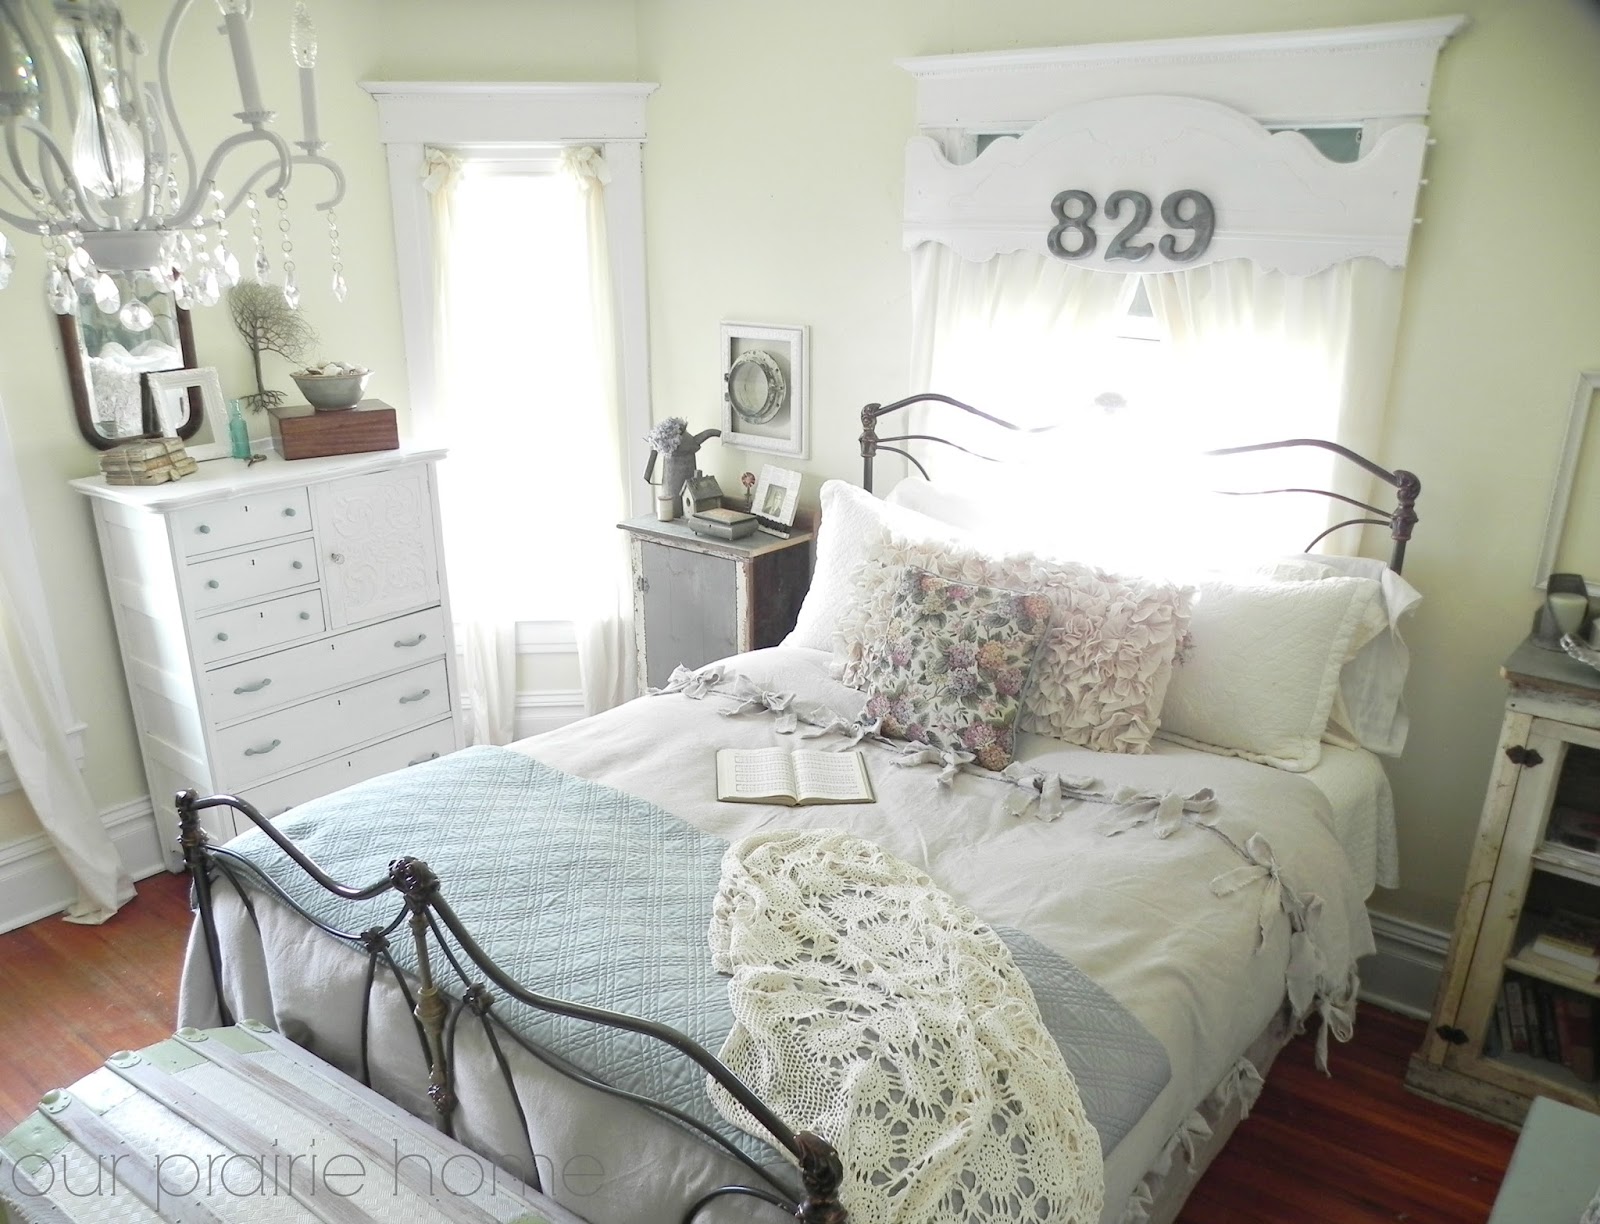
It all began when I started giving my bedroom a makeover a couple of weeks ago.
Click HERE to see our bedroom.
Click HERE to see our bedroom.
I looked and looked for a duvet cover
that would go with the feeling I had in mind for our master bedroom.
I searched high and low for one that:
1. Was what I was envisioning for our room.
2. Wouldn't break the bank.
Didn't happen.
So, then I thought on it for a while.
What could I use...
Then it hit me...
Drop Cloths!
They were perfect...
1. Cheap.
2. Durable.
3. Vintage Feeling.
And then it took me a little while to figure out exactly how I was going to do it.
Today, I'll share the process with you, in case you want to try it out yourself.
Now, there's a lot of materials, so you might want to grab a pen to write them all down.
Are you ready?
Okay.
MATERIALS:
Two 9'x12' canvas drop cloths
Scissors
Ruler/Measuring Tape
Yep. That's it.
Seriously.
LOL!
Now for the instructions...
INSTRUCTIONS:
Before you get started, I recommend washing both drop cloths two (2) times
with TONS of fabric softener.
(I used 3 capfuls per load.)
This gets rid of the stiffness and will make the fabric super soft.
INSTRUCTIONS:
Before you get started, I recommend washing both drop cloths two (2) times
with TONS of fabric softener.
(I used 3 capfuls per load.)
This gets rid of the stiffness and will make the fabric super soft.
It doesn't get any easier than this!
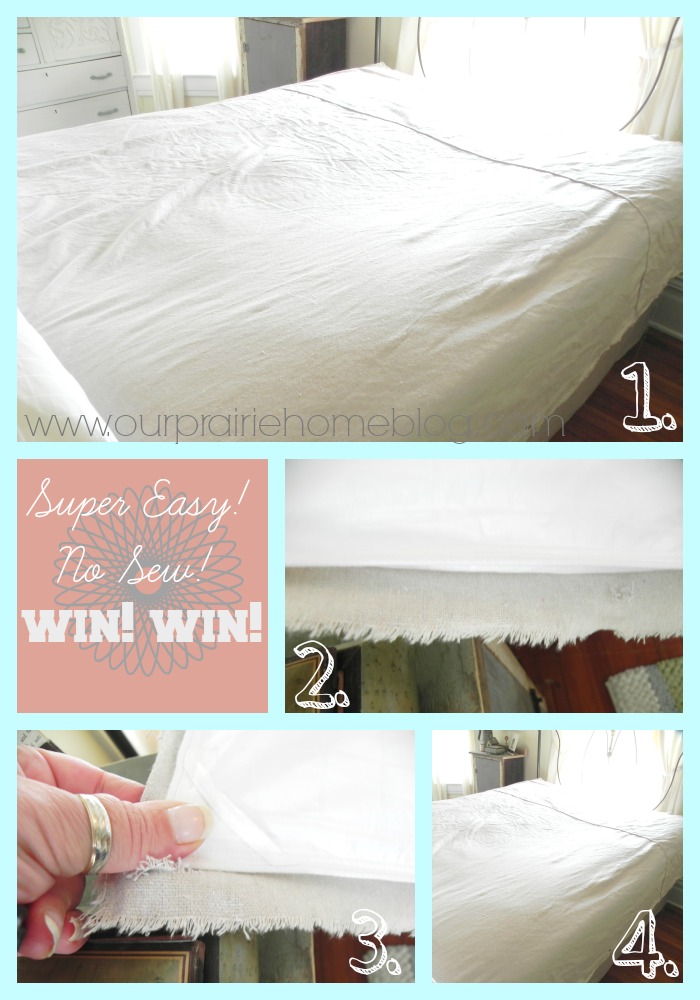
1. Lay out the first drop cloth.
(I used my bed.)
2. Lay your duvet cover on top of the first
drop cloth and leave a couple of inches between the edge of the drop cloth and the duvet on both sides, the top, and the bottom.
3. Snip the edge with your scissors, just so you're passed the hemmed edge. Do this at each edge. Then, RIP the drop cloth on each side, top, and bottom.
(You can cut it with scissors, if you wish, but I actually rip straight and cut crooked. LOL!)
4. Lay the 2nd drop cloth over the top of the duvet and repeat Step #2 and Step #3 making sure your edges of both drop cloths are aligned. This will be the top of your duvet cover.
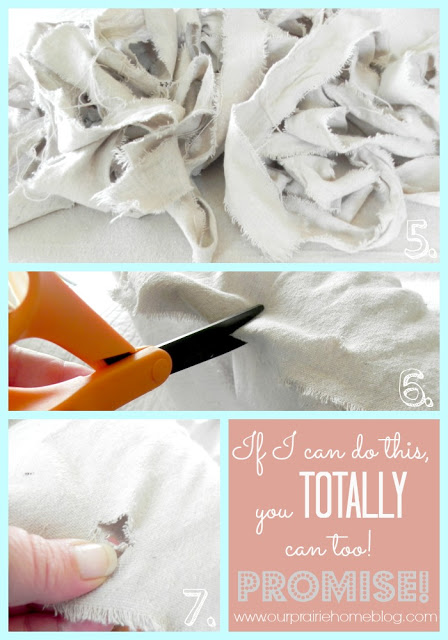
5. Using the left over pieces of drop cloth, rip into strips about 2-3 inches in width and 18-24 inches in length.
You will need between
44-46 strips of cloth.
{Or you could use a
pretty ribbon!}
6. Holding the edges of the two (2) drop cloths together, fold, and cut a small hole through both of the drop cloths.
7. Your hole should be about this size. For a queen size duvet, your holes will be spaced approximately nine (9) inches apart. You will have about ten (10) holes for each of the four (4) sides, plus one at an angle on each corner.
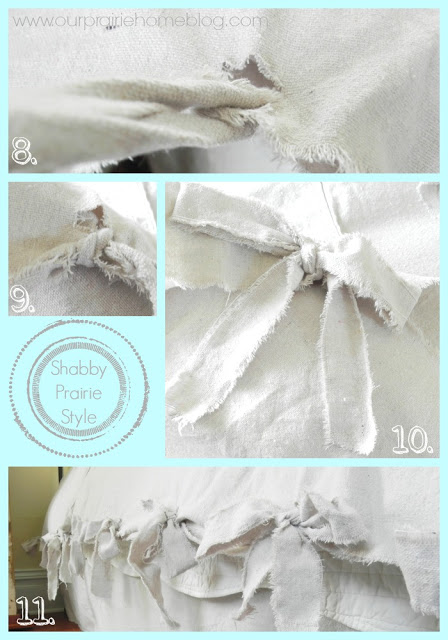
8. Thread one strip of fabric through each set of holes to tie your top and bottom pieces of drop cloth together.
9. Knot the fabric securely.
10. Tie fabric into a bow.
11. Repeat about Step #6 through Step #10 about 44 times. The amount of slits/bows depends on how closely you want your bows together.
And that's all there is to it!
Yes, it's that simple!
What I learned through trial and error:
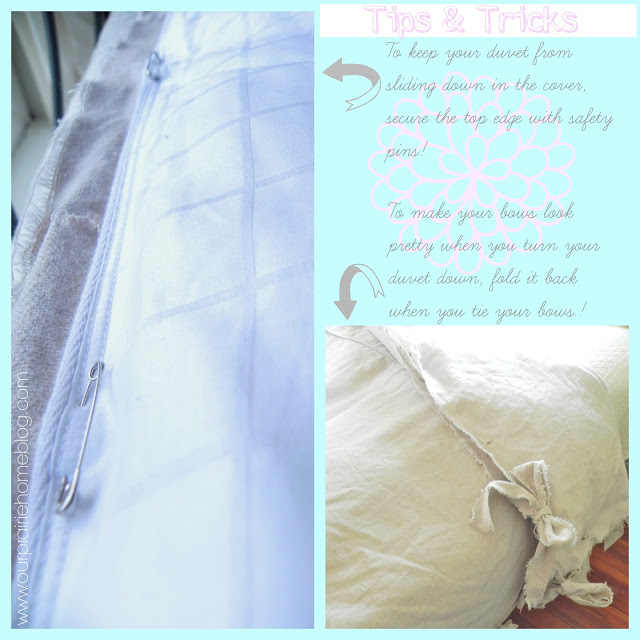
This is such a great look for a fantastic price!
I paid $18.98 for each drop cloth and still had enough left over to make a
serviceable dust ruffle for both sides and the end of the bed.
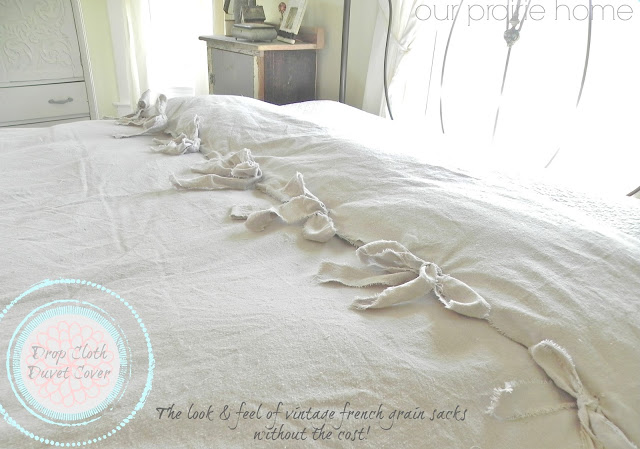
And you can get two great looks out of it:
Style #1:
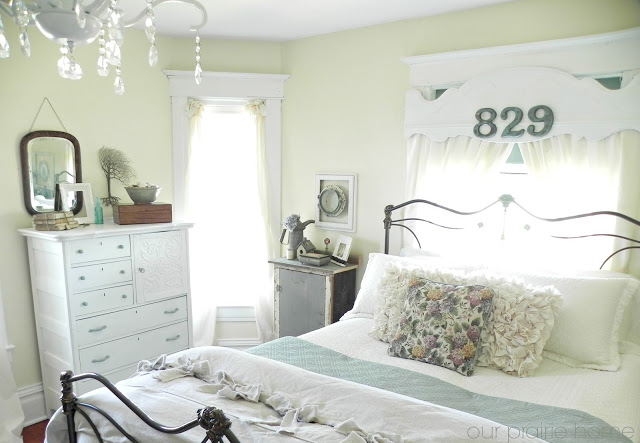
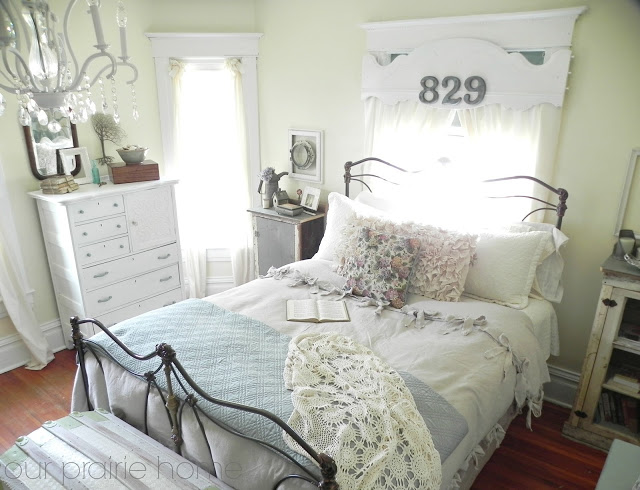
Folded back at the foot of the bed over two contrasting bed coverings.
Style #2:
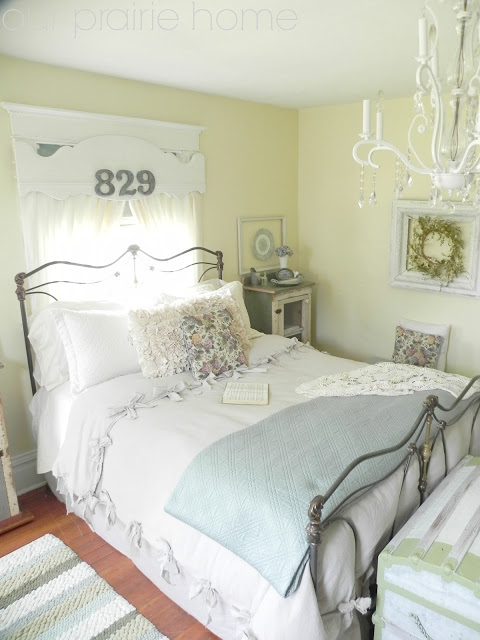
Use the duvet as a bed covering and fold a contrasting bedspread at the foot of the bed.
Either way works and looks fantastic!
I love how it feels and how it looks.
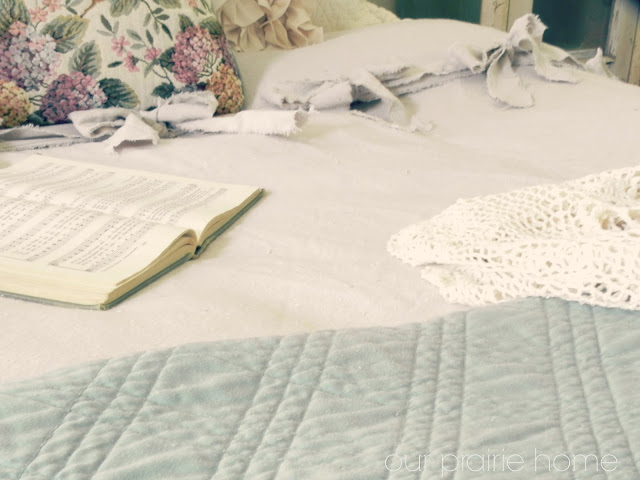
It's just such a great vintage look for a cheap price.
Plus, it's an easy no-sew alternative for all of us non-sewers.
And that's a winner winner chicken dinner in my book!

3. Snip the edge with your scissors, just so you're passed the hemmed edge. Do this at each edge. Then, RIP the drop cloth on each side, top, and bottom.
(You can cut it with scissors, if you wish, but I actually rip straight and cut crooked. LOL!)
4. Lay the 2nd drop cloth over the top of the duvet and repeat Step #2 and Step #3 making sure your edges of both drop cloths are aligned. This will be the top of your duvet cover.
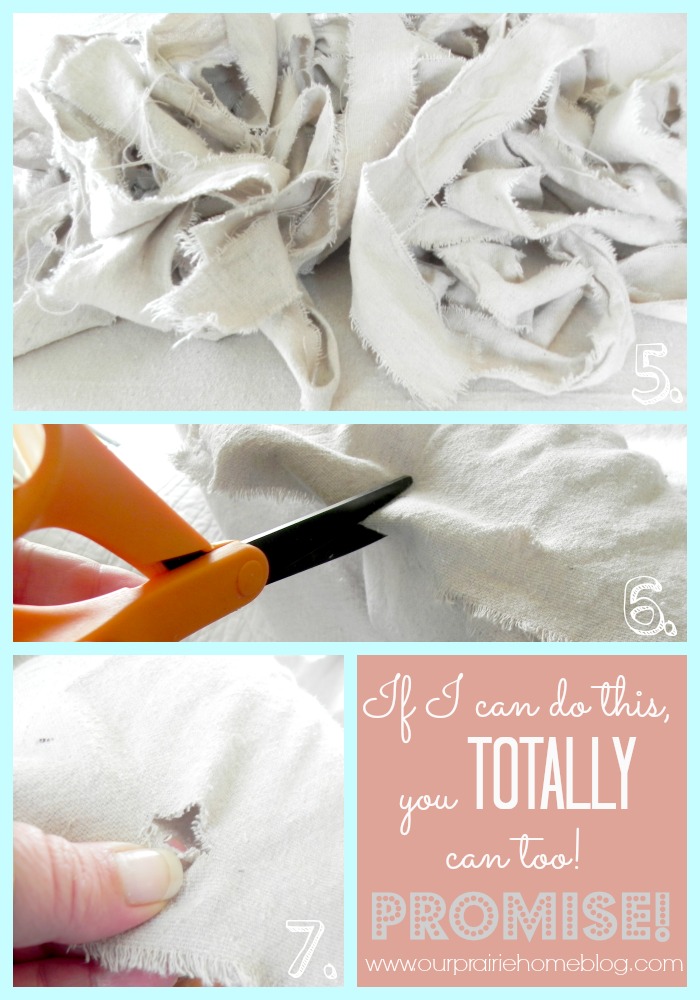
5. Using the left over pieces of drop cloth, rip into strips about 2-3 inches in width and 18-24 inches in length.
You will need between
44-46 strips of cloth.
{Or you could use a
pretty ribbon!}
6. Holding the edges of the two (2) drop cloths together, fold, and cut a small hole through both of the drop cloths.
7. Your hole should be about this size. For a queen size duvet, your holes will be spaced approximately nine (9) inches apart. You will have about ten (10) holes for each of the four (4) sides, plus one at an angle on each corner.
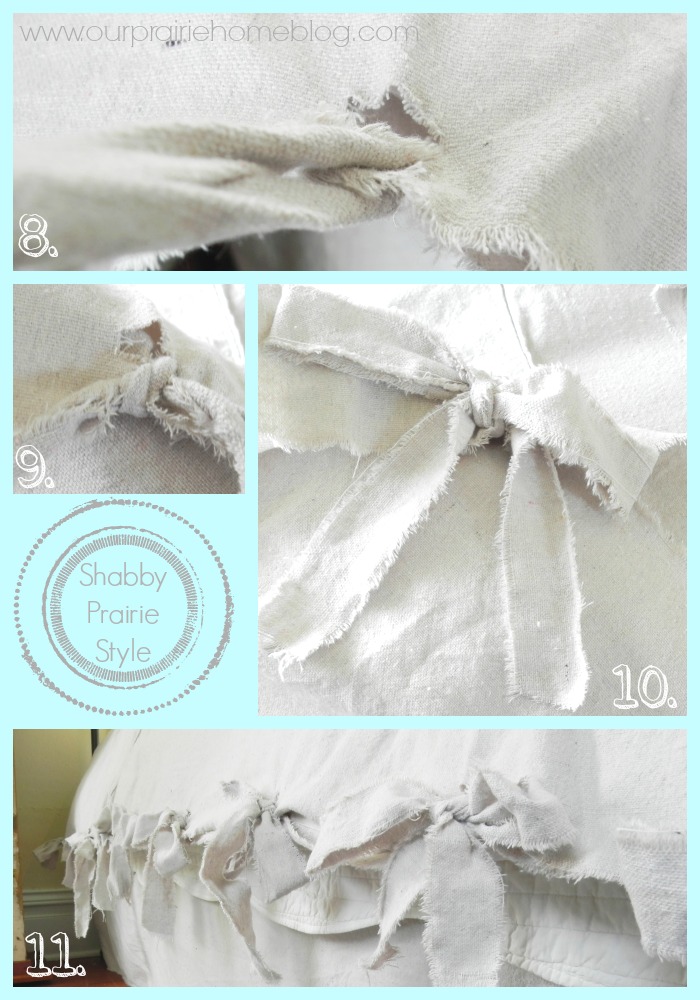
8. Thread one strip of fabric through each set of holes to tie your top and bottom pieces of drop cloth together.
9. Knot the fabric securely.
10. Tie fabric into a bow.
11. Repeat about Step #6 through Step #10 about 44 times. The amount of slits/bows depends on how closely you want your bows together.
And that's all there is to it!
Yes, it's that simple!
What I learned through trial and error:
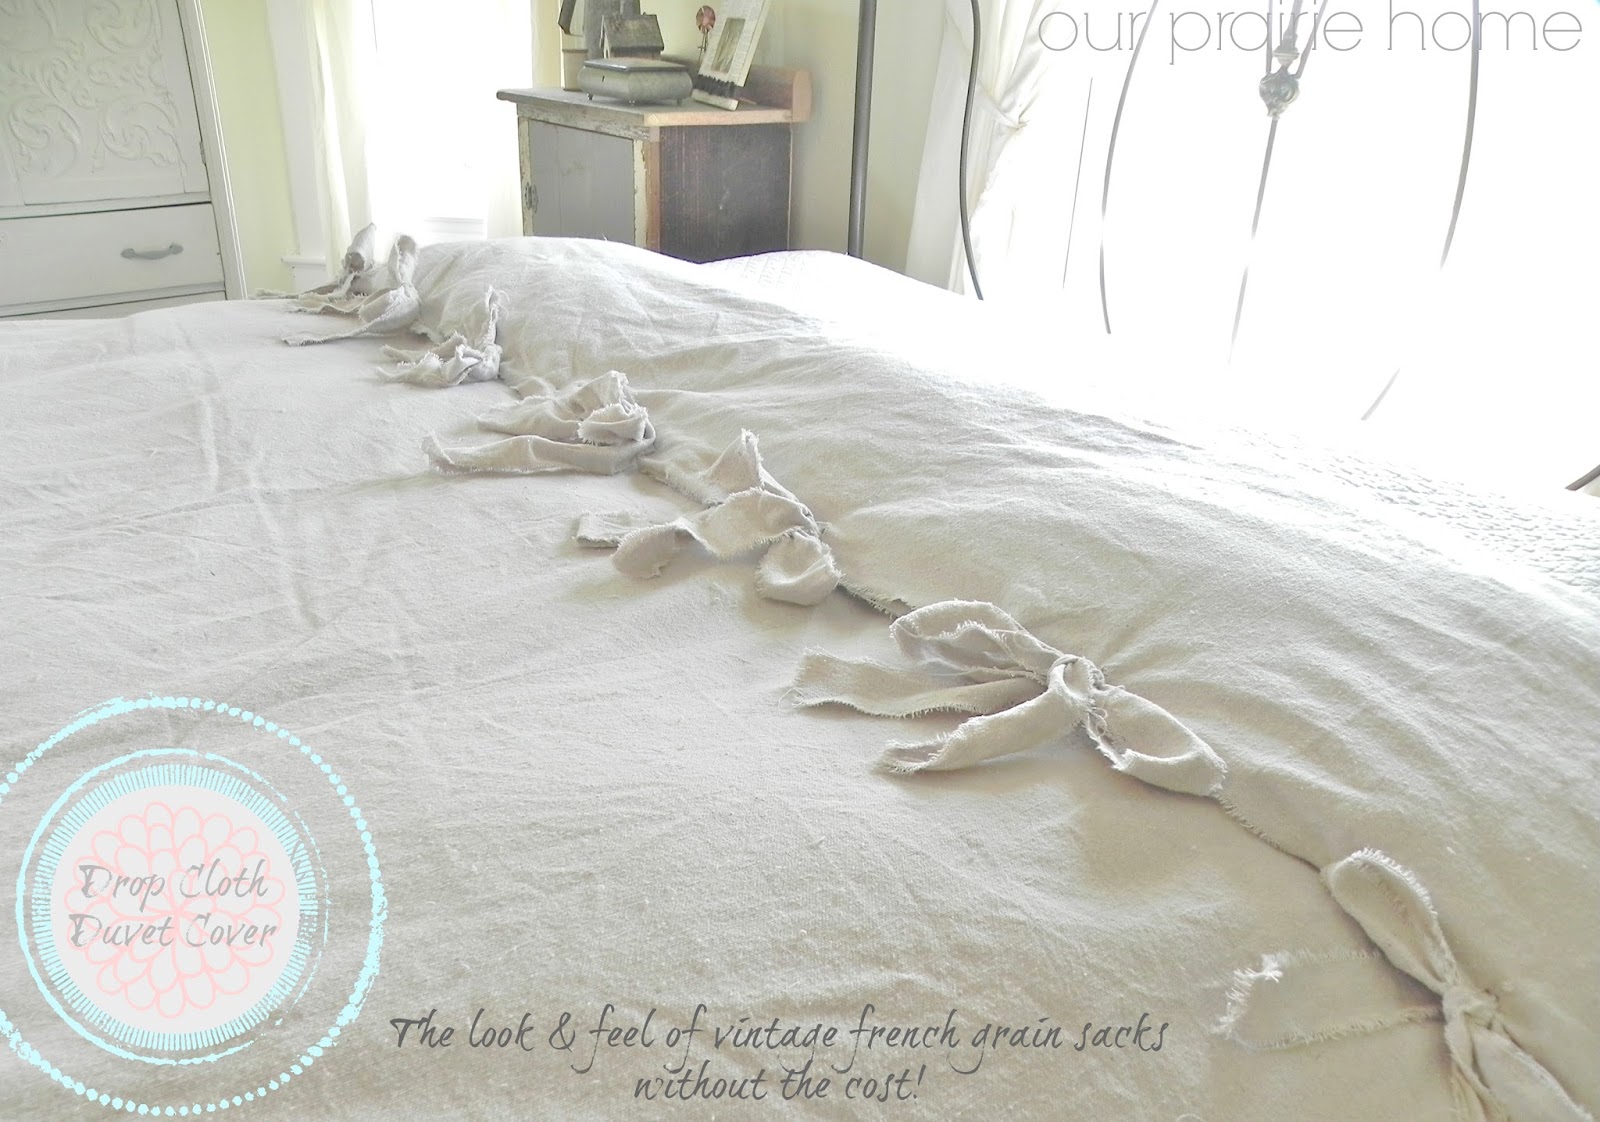
This is such a great look for a fantastic price!
I paid $18.98 for each drop cloth and still had enough left over to make a
serviceable dust ruffle for both sides and the end of the bed.
And you can get two great looks out of it:
Style #1:
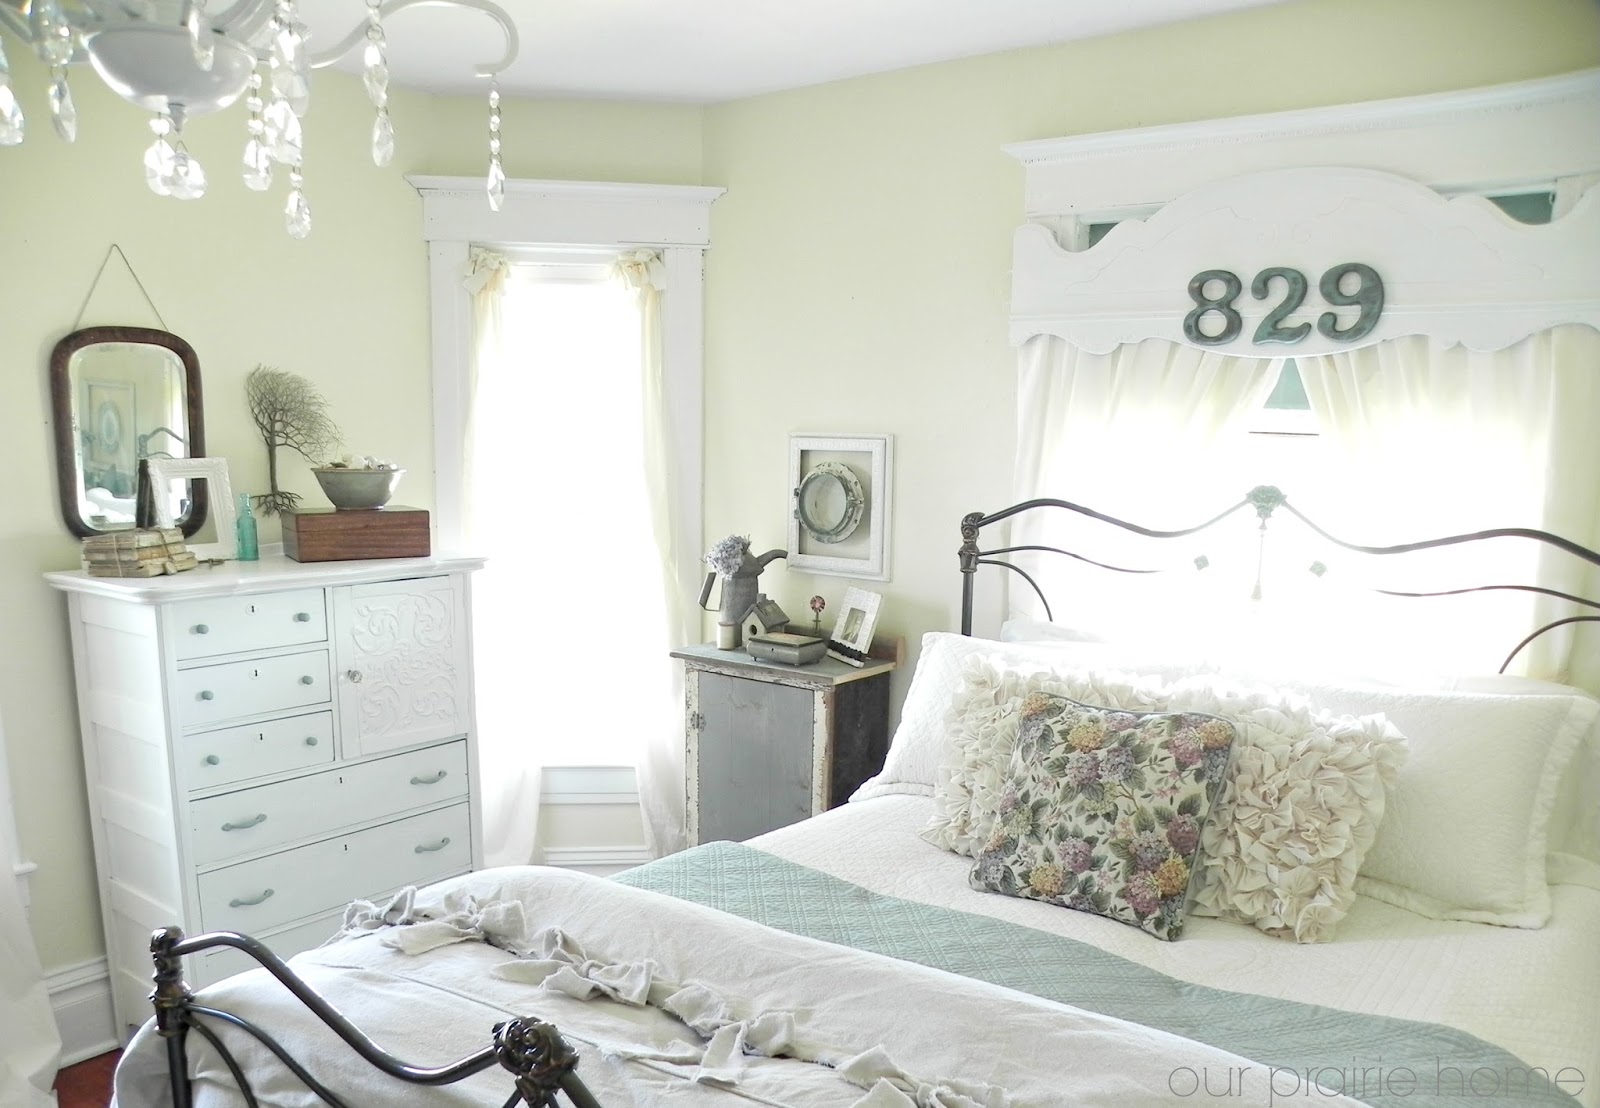
Folded back at the foot of the bed over two contrasting bed coverings.
Style #2:
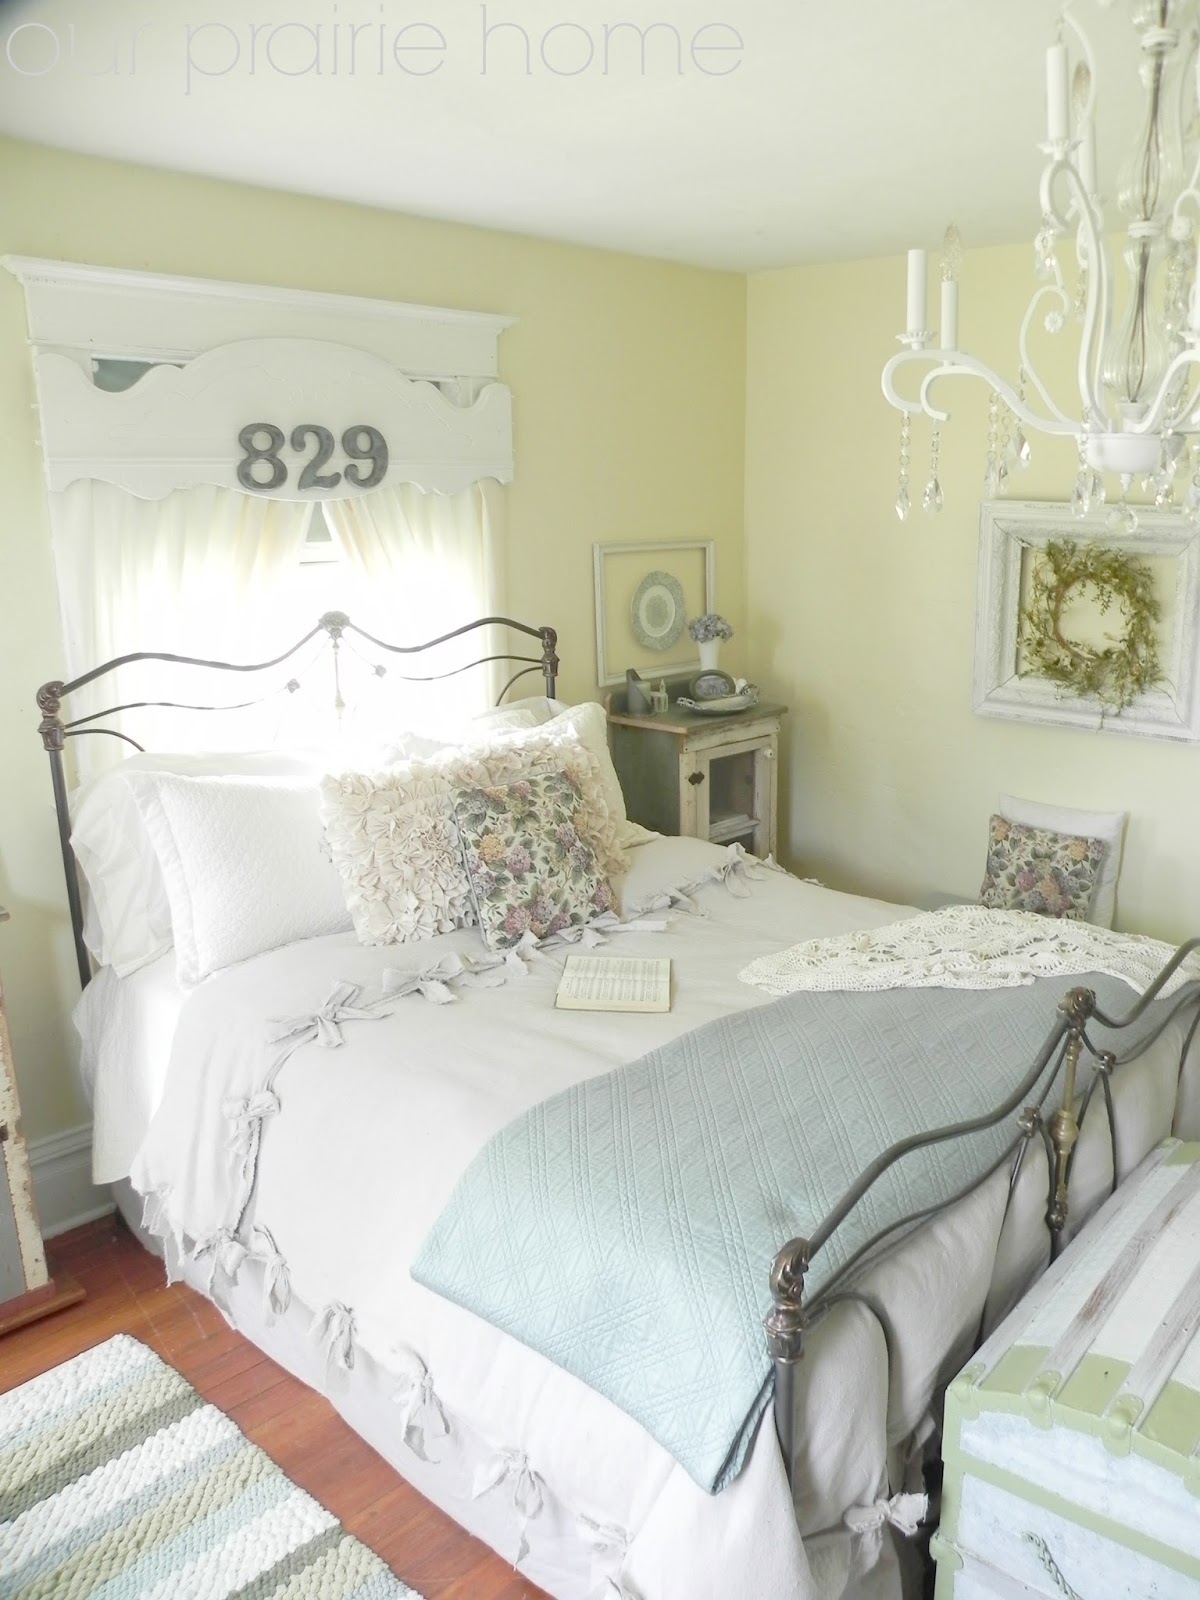
Use the duvet as a bed covering and fold a contrasting bedspread at the foot of the bed.
Either way works and looks fantastic!
I love how it feels and how it looks.
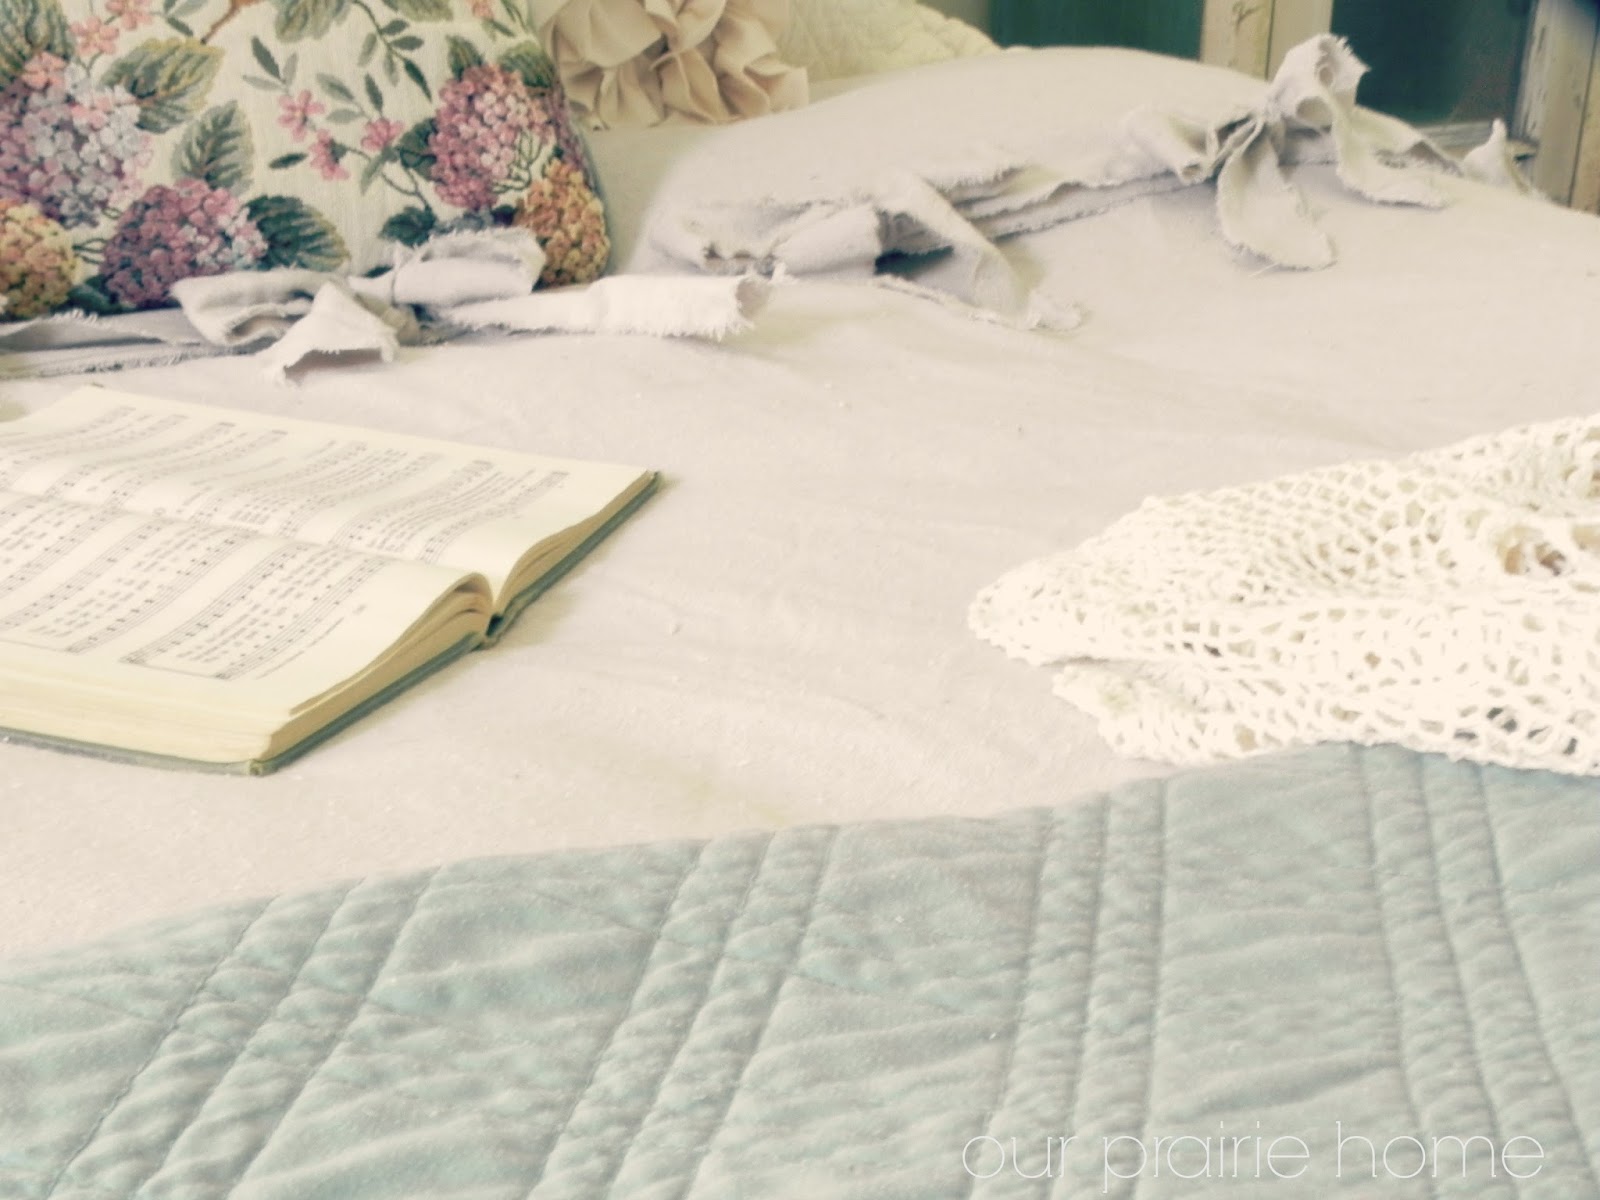
It's just such a great vintage look for a cheap price.
Plus, it's an easy no-sew alternative for all of us non-sewers.
And that's a winner winner chicken dinner in my book!


I love that Laura...and I AM a sewer! It looks so vintage and raggedy and pretty! Tearing the fabric is right by the way because woven fabric will tear straight every time.....I tear fabric all the time!
ReplyDeleteThis is a fabulous idea. I love it. I have to try this (hmmm ~ I think I'll start small) with maybe a pillow cover? Thanks for the inspiration ~
ReplyDeletePerfectly luvly! I am so going to do this :-) No sew does it for me every time!!!
ReplyDeleteLuv this room...
Hugs, Gee
Looks so cute! I love it! And I love drop cloth fabric! I use it to cover my sofa. It's so soft yet so durable!! My little dog jumps on it with wet feet (OH NO!!!) just pop in the washer and dryer and throw back on the sofa! Excellent idea!! Great pictures too! Thanks for sharing!
ReplyDeleteI love this idea... I also need a new duvet for a king size bed and the prices are - way out there... I have been trying to think how the drop cloth fabric would look and have been rolling this over in my mind for a couple of months... thank you for sharing because I now know it looks great and I can forge on with my idea...love yours it's perfect....
ReplyDeleteOMG, brilliant idea girl. It looks fantastic. I am sharing on my FB page today.
ReplyDeleteSO pretty.....love the ties! You have a beautiful bedroom :o)
ReplyDelete~Des
How did you make the dust ruffle?
ReplyDeleteI love how you attached the ties to hold it all together. Smart and thrifty! And it looks like a million bucks!
ReplyDeletethe ties will make it so much easier to get in and out. great idea!
ReplyDeleteI was the only girl in my home Ec class of 30+ girls who didn't finish her peasant dress. And my gym bag never functioned properly. I was shunned.
ReplyDeleteThis is brilliant!!! I love this and yes like you I am a no sew girl :-) . I am so behind in emails....trying to catch up with reading my blogs and emails.
ReplyDeletexx
Anne
Oh my gosh! It looks adorable! Love!
ReplyDeleteWow! gorgeous cover and great tutorial. Love it!
ReplyDeleteFound you on Pinterest...I LOVE THIS!!! Thank you for sharing your know how with us. :)
ReplyDeleteBlessings~
Hi Laura,
ReplyDeleteI found you over at Pamela's and you speak to me with your style. Love it. I am a new follower. Beautiful home tour. You have done a great job with transforming your home. Your style and mine are so similar glad to be a new follower.
Kris
Wow! This is amazing - it looks so good and can't believe you managed to do it without any sewing. Brilliant!
ReplyDeleteI would love for you to share it at this week's Empty Your Archive where we are linking up posts on bed linens - Alice @ Mums Make Lists
http://mumsmakelists.blogspot.co.uk/2013/10/empty-your-archive-27.html
I was wondering if I could use flat sheets to do this too?
ReplyDeleteI was wondering if I could do this with flat sheets?
ReplyDeleteI have been trying to think how the drop cloth fabric would look and have been rolling this over in my mind for a couple of months... thank you for sharing because I now know it looks great and I can forge on with my idea..You have done a great job with transforming your home. Your style and mine are so similar glad to be a new follower.
ReplyDeleteI will also try this it is more helpful for people who want to know how to make a duvet covers..
ReplyDeletePeople who bored from old duvet covers, springwel is the best option where you can buy duvet covers in unique print, design an colors.
where to buy duvet covers
I made one yesterday for my king size and LOVE it!! Thank you so much for your amazing idea. I too don't sew so I had to find a way around that and duvets are very expensive. The only difference is I cut strips up and tied each set of strips together like a tie blanket. If you know what I'm talking about. I did the bows at the head of the duvet though and it's so cute!! Thank you again!! Lex :)
ReplyDeleteThank you so much for sharing this!
ReplyDeleteBeautiful!! I do sew and I would make this following your instructions. I would be tempted to sew something but I wouldn't because I would want it to look just like yours. I just love it :) And your bedroom is really, really pretty...
ReplyDeleteHow can I do this in a front loading machine? With the 3 cap-fulls of softener?
ReplyDeleteMy sewing machine died and I needed a no-glue, no-sew tutorial, and this was so perfect. You are a complete lifesaver! Now I'm going to go breathe and drink some coffee and get this done! ;)
ReplyDeleteIt looks amazing - is it soft/snuggly enough to use while you sleep?
ReplyDeleteI like your blog, search a amazing Bed Sheets, You definitely inspired me.
ReplyDeleteThis written piece gives fastidious understanding yet.check this link right here now
ReplyDeleteYeeehawwwww I am so happy I came to Pinterest tonight. I painted my bedroom months ago but haven't been able to find a duvet cover that spoke to me.. While I wanted to go with a Grey one, I'm starting my search for drop cloths as soon as I finish typing this ..
ReplyDeleteThank-you SO much :)
Ellen