

Today is the last day Blog School!
YAY!!!!
(Which also means I better get to making something
You can find the series on creating a blog header to include a picture collage in three segments: HERE, HERE, and HERE.
You can find the tutorial on how to create pretty sidebar link labels HERE.
Now, we're going to make Connect Buttons.
What are Connect Buttons?
Well, those are these:
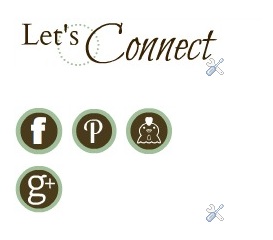
I know some people also have links to their e-mail account and RSS feeds, but those I haven't figured out yet.
If I do, I'll let you know.
These buttons, with one click, will connect your blog readers to your Facebook Page and your Pinterest, Twitter, and Google+ Accounts, so they can "like" you or "follow" you there, as well.
Of course you don't have to have connect buttons for all of them, if you don't want to or if you don't have those accounts.
I happen to have all four, so that's what I created.
And let me tell you, it took A LOT of googling
to find a tutorial that I understood.
That's why for the last week I have broken each tutorial down step by step with pictures to make it as easy for you as possible.
Just reading instructions sometimes,
especially if you're not familiar with computer-ese,
is very confusing!
And today, I'm going to try to make it easy for you.
Make sure you read each of the step by step instructions,
so you don't miss out on a crucial step.
Why do I say this?
Well, I didn't with the tutorial I was following and that's why it took me TWO HOURS to figure out what I was doing wrong.
How did I figure it out?
I went back and reread everything
and then slapped myself upside the head for all the wasted time.
HTML Codes are the absolute devil
and one tiny mistype can screw the entire thing up.
Trust me.
Literally it was one of these (") being at an angle when I copied and pasted the code that threw the entire code off.
The devil, I tell ya!
;)
All right.
Deep breath.
Ready?
Let's go.
First, it's back into PicMonkey again.
At this point, you should be a pro at PicMonkey, right?
;)
We're going to create your button image.
Click on "Edit a Photo".
Upload your white image:
| White Image If you don't have one, right Click on the image above and save the image to your computer. Put it in its own separate file. |
Go into the "Overlays" tab
and click on "Geometric".
Overlays:
Then, Geometric:
Now, you don't HAVE to use geometric.
That's what I used,
so I'm using it as an illustration.
Don't be bound by the confines of what I did. You can use whatever you want... Hearts, Stars, Labels, etc...
The sky is the limit.
So click on whatever shape you want to use for your button.
Resize the image using the image box.
Remember to make the image small, because whatever the size of your image, that's how big it'll be on your sidebar.
For this illustration, I'm going to make a Facebook link button.
In my case, I used two circles:
Change the colors to
complement your blog.
I chose a sage green and a dark brown, like my blog text.
Be sure to write down the number ID of the colors you used,
so you can match each button to the exact shade of each other.
The number you are looking for
is above the little solid colored rectangle, like below:
Clicking on the numbers turns it gray and then you can type in your color ID number for an exact match.
For my button, I overlayed a smaller dark brown circle
over the top of a larger sage green circle.
The next step is to go into the "Text" tab.
Choose whichever font you want to use for the letter "F".
Personally, I used Verdana in bold.
Change the text color to white and then drag it
to center it over your shape.
Move your text box to make the "F" larger or smaller,
so it fits inside your overlay.
Next, go into the "Basic Edits" tab.
Click on "Crop".
You're going to want to crop the rest of the white image
so you're just left with the button you created.
In the image above, the gray area shows what is cropped off.
The small area of white around the button
is the only part of the white image that is left.
Click "Apply".
You should be left with this:
See?
A teeny-tiny little button.
Save it to a file on your computer. Probably the best way is to create an entire file dedicated to just your buttons.
You can go ahead and create all the other buttons you need now, like Pinterest, Twitter, and G+ the same way.
You can find the bird I used to my create Twitter button
in the "Overlays" tab under "Ordinary Beasts".
Next we're going to go into Photobucket.
If you don't have a Photobucket account,
you're going to need to create one.
Long story short, when we make the HTML code for your button, you have to have a url online where the image is hosted.
For me, Photobucket is the easiest and most user friendly.
After you sign in,
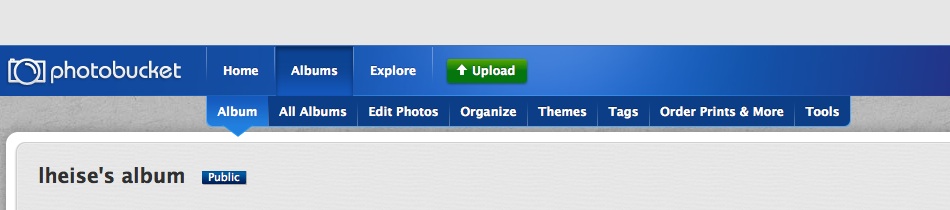
you will be taken to this page:
Click the green "Upload" button and upload all the buttons you created that you saved onto your computer from PicMonkey.
After you upload all your button images,
you're going to click on "View Album".
It will take you to your album page:
Okay...
Here's where the headache starts.
You might want to take an Excedrin to head it off at the pass.
LOL!
In another window, go to your blog page.
Click "Design". Select "Layout".
On your side bar layout click, "Add a Gadget".
In the window that opens, scroll down and click on "HTML/JavaScript".
Title the Gadget Box "Buttons".
You'll go in and delete the title later.
Next, go back to Photobucket.
When you hover over each connect button that you created,
a little box will pop up that looks like this:
See where it says "Direct Link"?
Click on the box beside it
and it will copy that direct link automatically for you.
Next, copy this HTML code
letter by letter
symbol by symbol
into the HTML/JavaScript text box.
-------------------------------------------------------------------
<a href="the URL you want the button to go to"target="_blank"><img src="the direct link that you copy and paste from Photobucket" border="0" alt=""/></a>
-------------------------------------------------------------------
Where I typed "the direct Link that you copy and paste from Photobucket" in bold, you're going to delete my words and paste the direct link you just copied from Photobucket in between the quotation marks.
Where I typed "the URL you want the button to go to", you're going to delete my words and type in the URL of your Facebook page (Twitter, Pinterest, Google Plus account according to which button you are doing.)
To make this easier, open up a new window, go to your Facebook or Twitter or whatever account and copy and paste the code in between the quotation marks.
Everything else remains the same.
You can even copy and paste the HTML code above into your HTML/JavaScript text box, delete the bold text, and fill in the URLs as I discussed, so you don't have to painstakingly type each and every symbol and letter.
Important!
***But, if you do that, be sure that all the " are straight up and down and not slanted after you paste it. If you have one that does that, just delete it and retype it in. If you don't, the link won't work. It will send you to a page that says "This blog page does not exist" when you click on the button.***
Yes, I found this out the hard way.
;)
"Save" the text box each time you add a new connect button.
Select "Preview" on your layout page just to make sure the button came through right and you see your button image.
I would even go so far as to "Save Arrangement", "View Your Blog", and click on the each newly created button to make sure it sends you to where you want it to send you.
Next, do the same thing with the rest of your buttons
in the same gadget box.
Do the same exact thing only changing the URL you want the image to go to for each button. Twitter would go to https//:twitter.com/blah blah blah, Pinterest would go to http://pinterest.com/blah blah blah, so on and so forth.
**If you want all your buttons side by side,
do not put a line between each HTML code.**
**If you want a space, so they're lined up vertically down your page, put <br> in between each button code.**
When you're done, it should look like this:
| (No line break between codes so they line up horizontally.) |
Obviously, your URLs that you type in will be different than mine, but the code itself is the same.
Select "Save" a final time.
Right now, your Buttons Gadget Box is at the top of your sidebar.
Drag it down to where you want it.
Click "Edit".
Delete your title.
Select "Save".
Select "Save Arrangement".
Select "View Your Blog".
And pat yourself on the back for a long, hard job, well done!
Don't they look great?
And the cool thing is, it connects your followers
to all the places you are on the web.
WINNING!
And how cool is that?
Pretty darn cool!
Dream Big,

I did it! Including the RSS and Email icons! I'm looking for your email so I can let you know how I did it!
ReplyDeleteLaura, Thank you so much for the great lessons on "Fancifying your Blog". I created the side bar links last night and I'm going to do the buttons tonight. I don't know if my blog looks any better but I like the changes so far. I truly appreciate all of your step by step instructions! ~ Jamie P.S. If you figure out how to do the e-mail button I would love that info. as well! :)
ReplyDeleteLaura, thank you so much for the step by step instructions! I seriously needed this help. I just created my facebook and pinterest buttons, now I'm going to back up and read your other posts about fancifying our blogs. I need all the help I can get. THANK YOU!
ReplyDeleteLaura,
ReplyDeleteThanks so much for these posts!!!! I finally did my buttons (I made them look like chalkboard decals) tonight and the e-mail one completely worked. Thanks so much for e-mailing me the how to on that part. You're truly the best! I know you're taking a blogging break right now so don't worry about responding back. :) Thank you, ~ Jamie
Thank you so much for this easy to understand tutorial...computers and I are not always friends, but you made this so easy for me...I got my buttons done in about 90 minutes!
ReplyDelete